One day, I was looking through my window and I saw the bright waxing crescent Moon shining through the pale blue sky. A question came to my mind: is it possible to photograph earthshine during the day?
Earthshine is the illumination of the otherwise dark side of the Moon caused by indirect sunlight reflected from Earth. While at night it is visible to the naked eye, especially when the Moon is close to new, it’s a different story when the Sun is still out.
Attempt #1
I brought the telescope out and, after a very rough polar alignment, I started shooting. I took 155 images, of which I have stacked around 100.
OPTICS: SkyWatcher 130PDS + .71x reducer (~460mm f/3.5)
CAMERA: Olympus Pen-F
SETTINGS: ~100 * 1/8000s exposures at ISO 800
CALIBRATION: flat frames
I used ISO 800 as, in my testing, I found that it was less noisy than ISO 200 and 400 when keeping exposure time and aperture constant. However, in this case I could (and probably should) have used the lowest ISO and boosted the exposure time, which would have likely resulted in a cleaner image with higher dynamic range. Unfortunately, I made the same mistake in all the other attempts.
In this photo the earthshine is not quite visible and there are many imperfections: flats did not work properly and there is walking noise in the photo, as the source images were not dithered.
I was planning to try again the same day, but clouds rolled in and did not want to go away.
Attempt #2
A few days later, I got to work again. This time, I removed the reducer to get a closer view of the Moon.
I used continuous shooting to take as many images as possible. Furthermore, in the time between bursts (needed to empty the camera buffer), I slightly moved the mount: this way the images were dithered and the walking noise disappeared.
Once again, there was no earthshine, even after heavy stretching. I decided to shoot at a later hour for the darker sky.
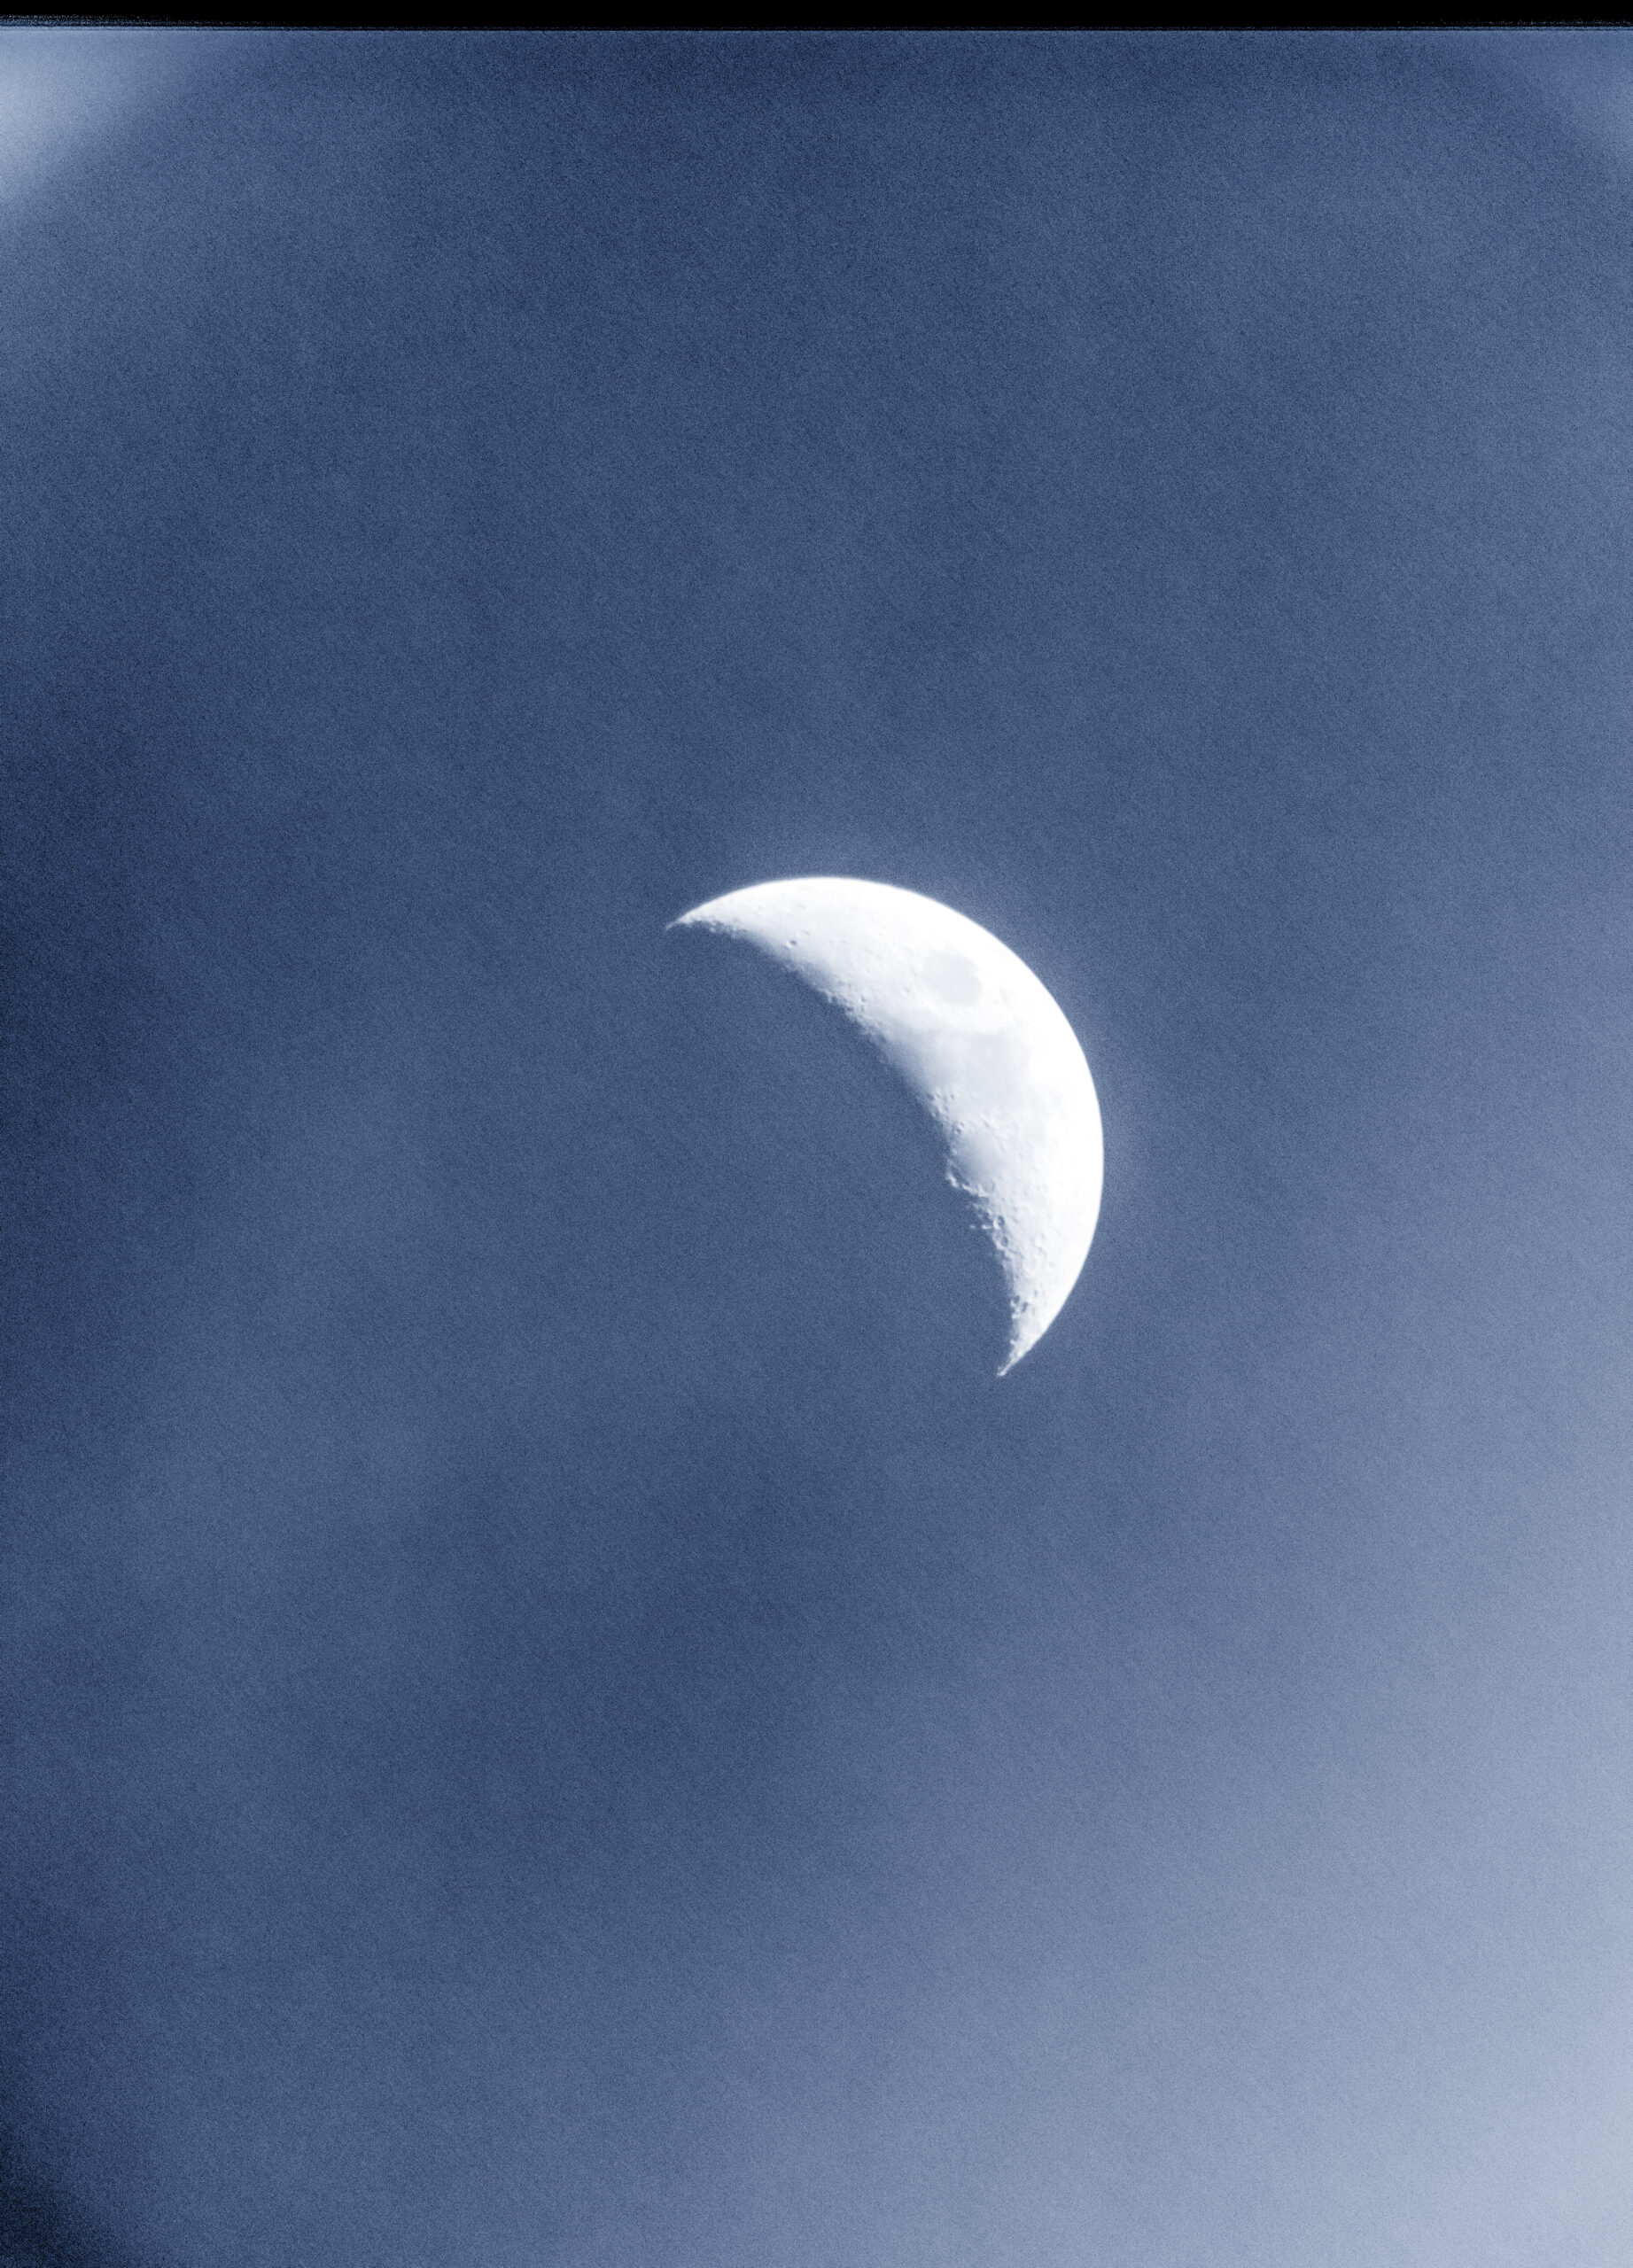
Attempt #3
Two days later, I once again set up the telescope and waited for the Sun to go down. I took the images, with dithering, the flat frames and started processing. While still subtle, this time earthshine is definitely noticeable.
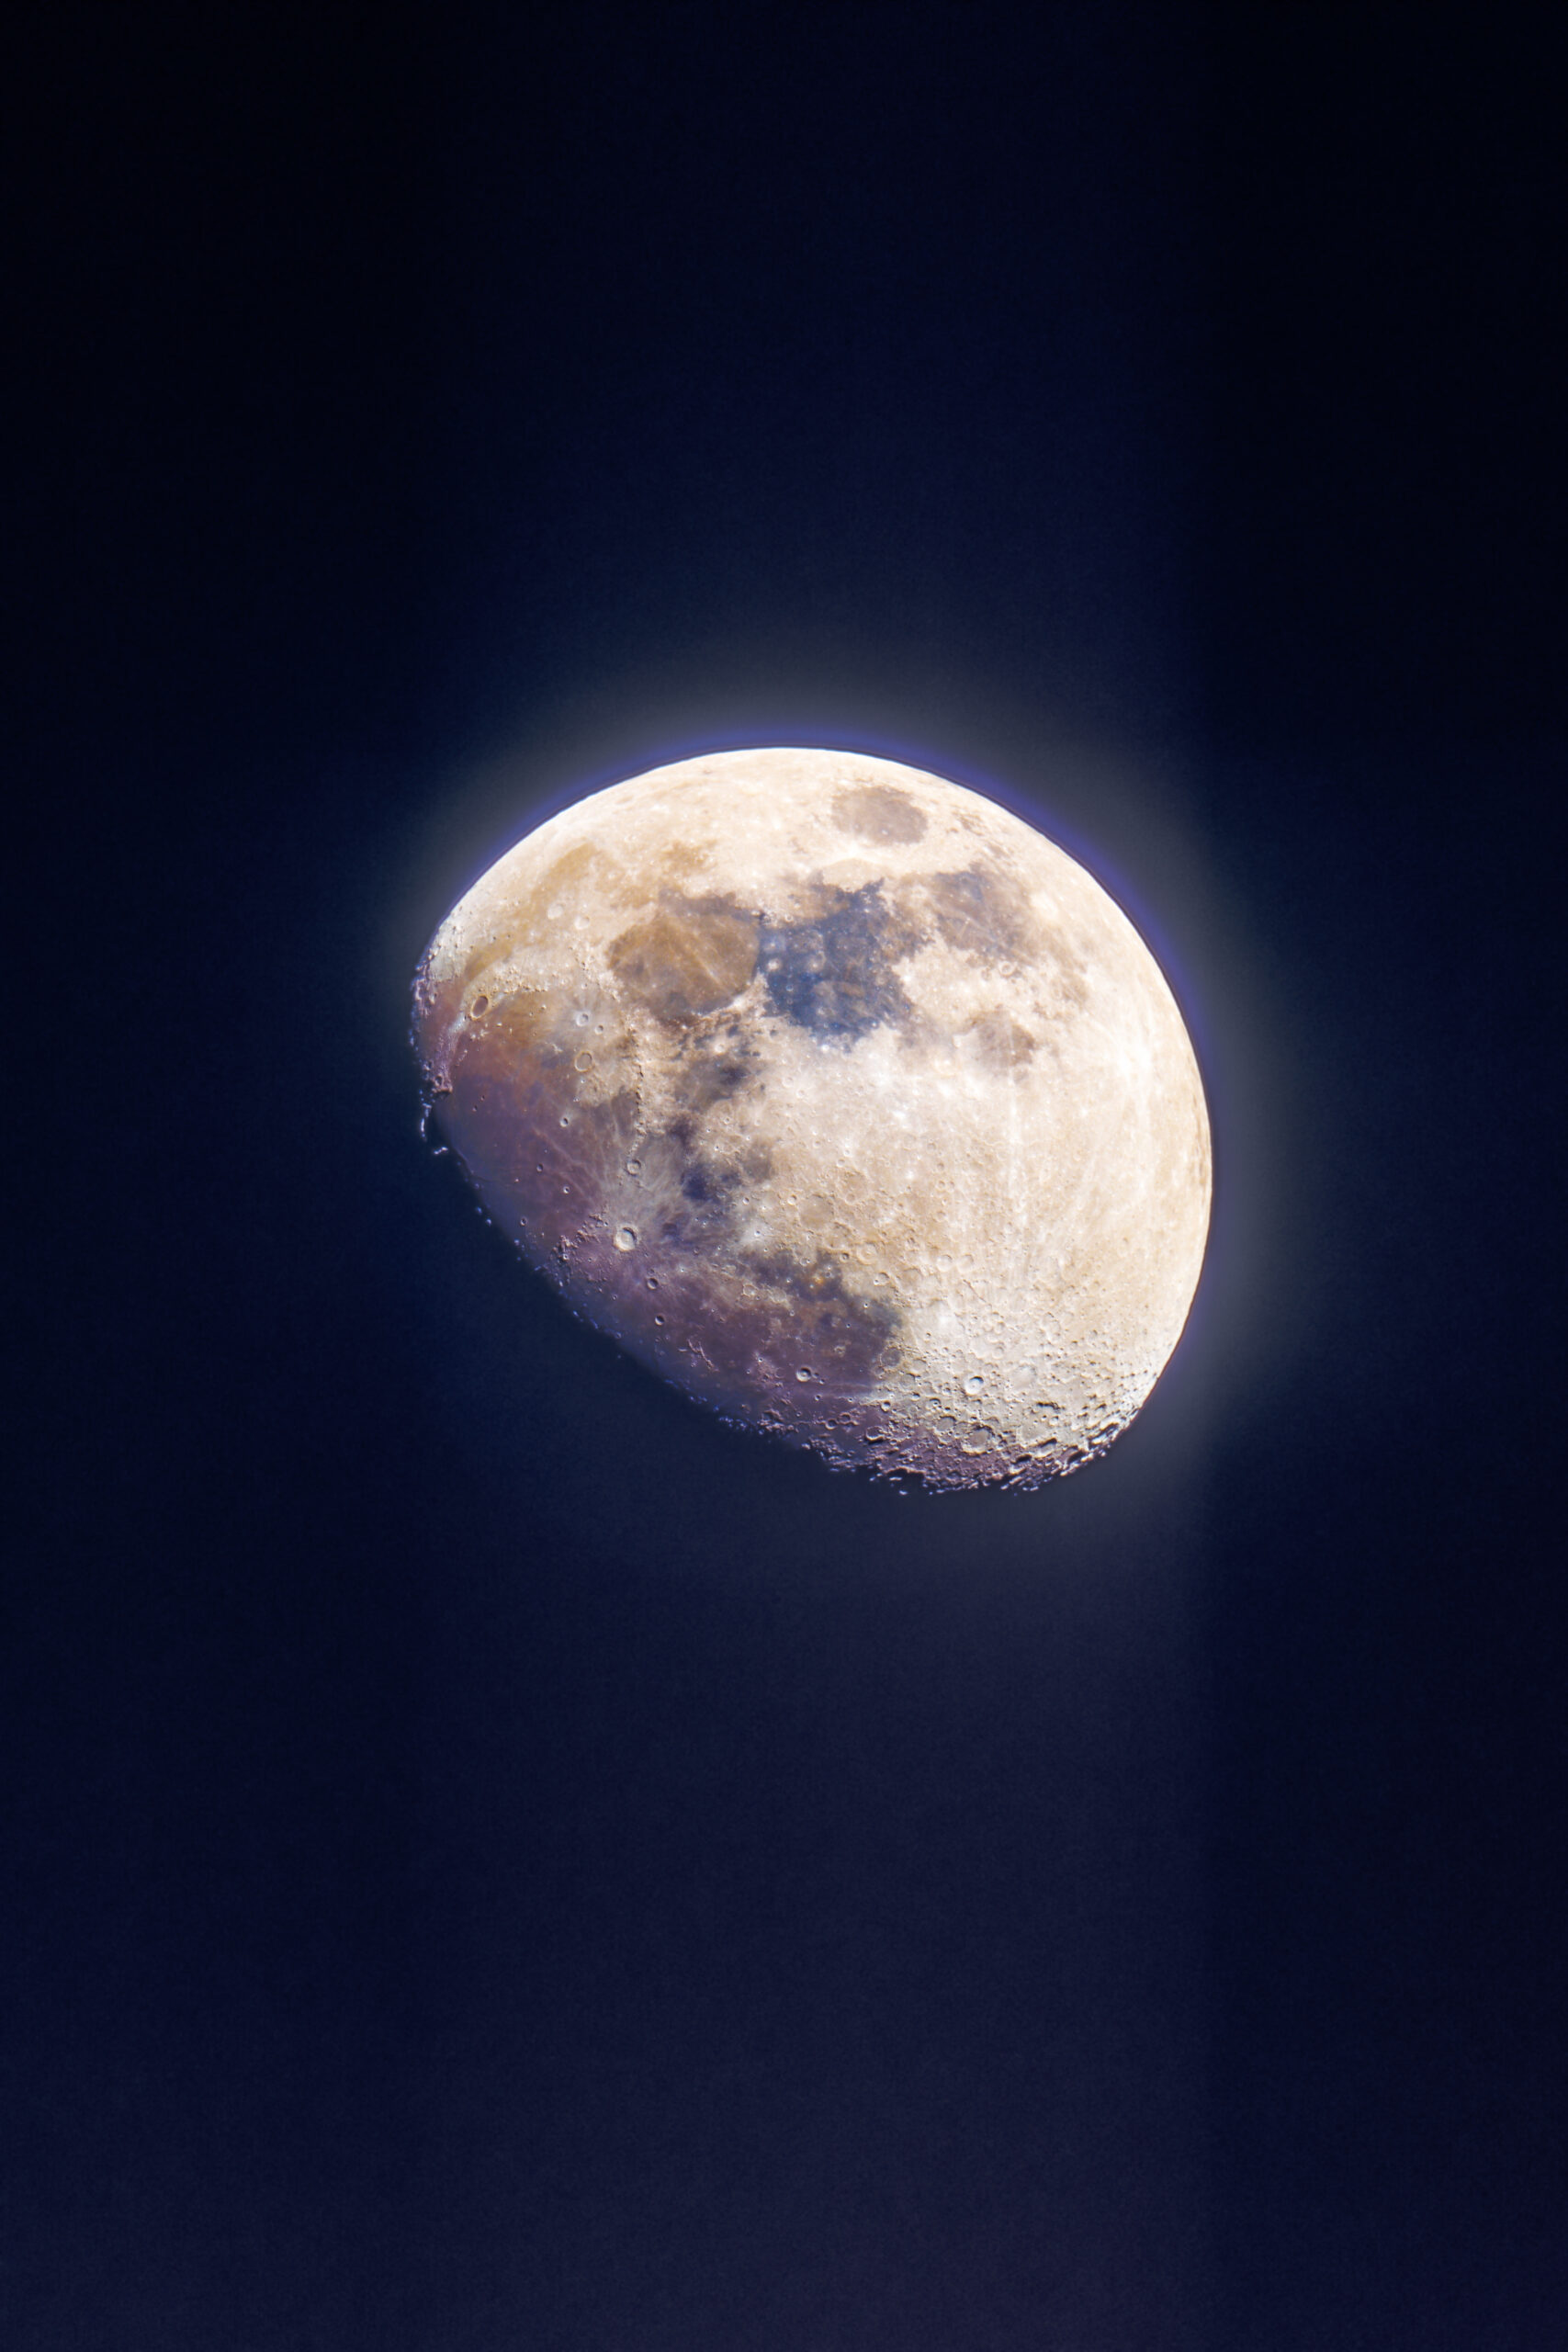
OPTICS: SkyWatcher 130PDS (650mm f/5)
CAMERA: Olympus Pen-F
SETTINGS: ~200 * 1/500s exposures at ISO 800
CALIBRATION: flat frames
Discussion on camera settings
I decided to use only one exposure time and not go for an HDR composite because I didn’t want to waste time changing settings. The lighting was varying rapidly, so I set myself a limit of 5 minutes to capture light frames. I chose the longest exposure time such that no highlights were clipped and took as many photos as possible. This way I had enough data to both sharpen the Moon’s surface and reveal the faint earthshine.
Thinking about it now, this may not have been the best technique, as the shadows ended up being very noisy, but I’m still satisfied with the result.
Editing
I stacked the images in Lynkeos and opened the stack in Photoshop. Masking was necessary, as the darker parts of the image needed to be processed very differently from the bright, sunlit surface. However, as I did not want to “fake” my result, I mostly used color/luminance masks to isolate the different parts of the image. I thought: “If Photoshop can’t detect the difference between two parts of an image, there is none, so I mustn’t edit something that was not captured in the first place”. I did use a single radial mask to isolate the entire Moon disc, but that was done at the very end of processing and the adjustments were minor.
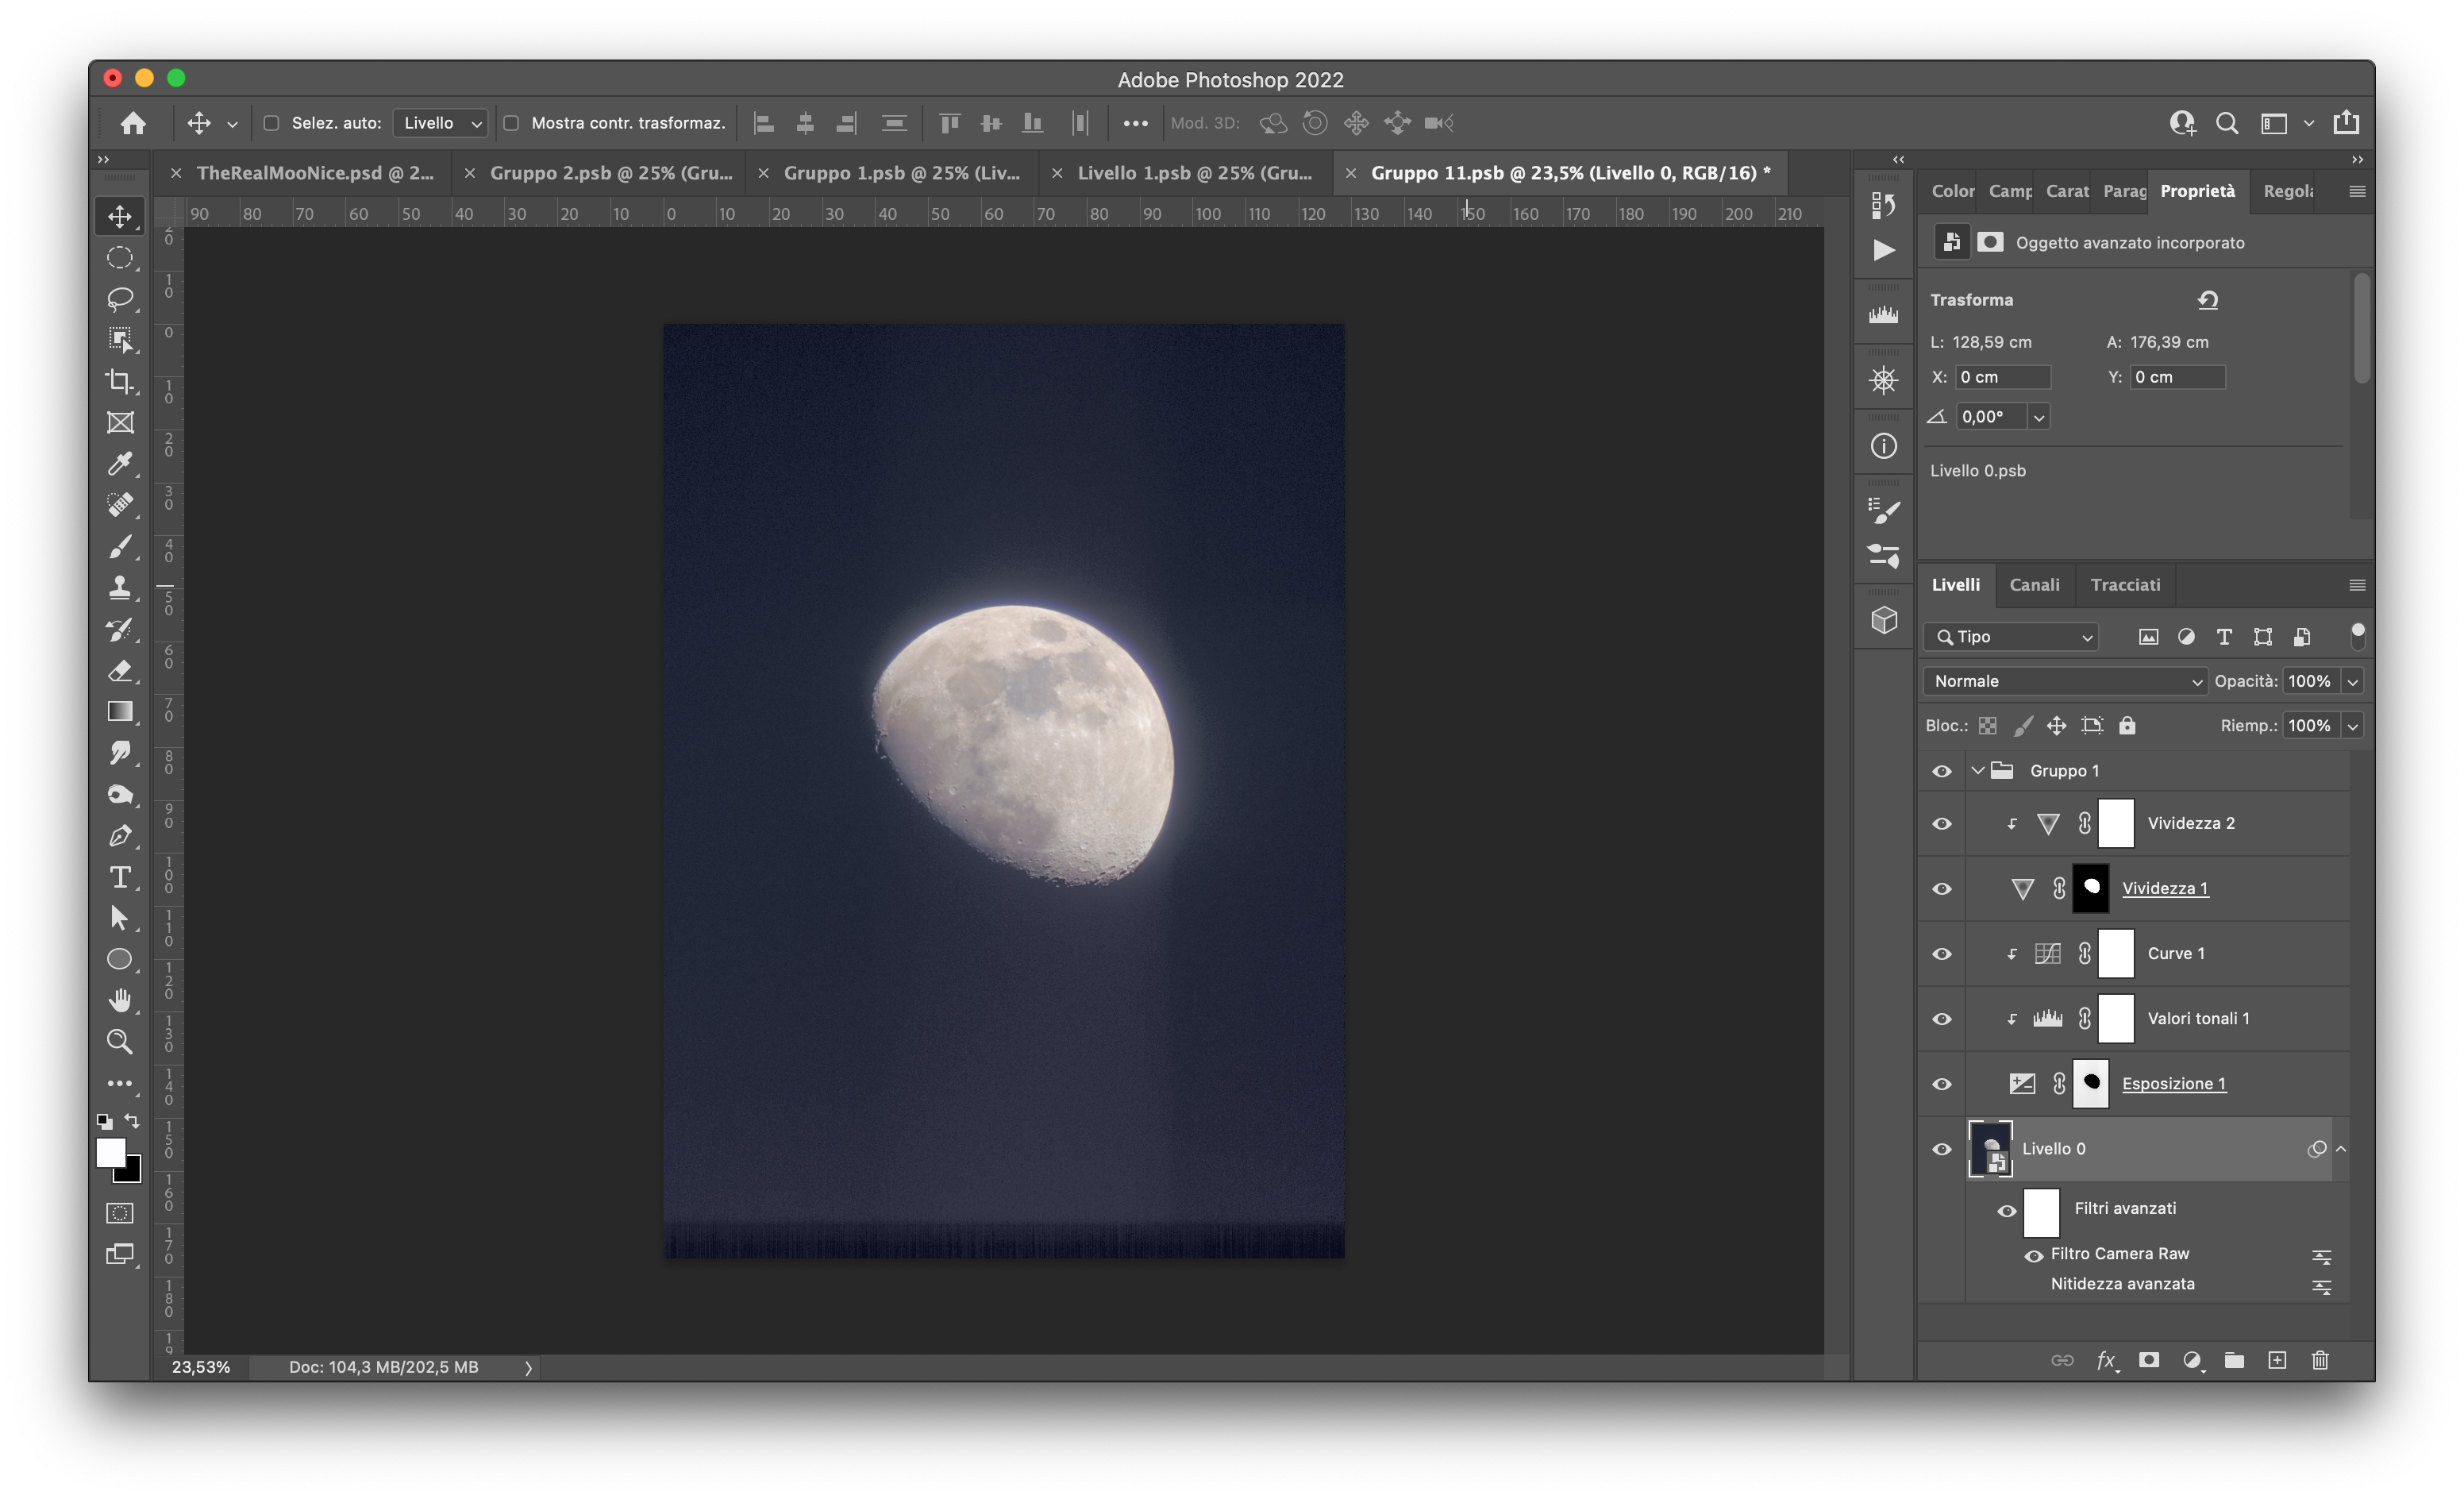
This is one of the first steps of processing, in which I made the initial stretch to the background, bringing out the earthshine, and saturated the Moon’s surface. Other steps include denoising, sharpening and other adjustments, both using Camera Raw and Photoshop’s adjustment layers and filters.
Conclusion
Attempt #3 is one of my favorite images I have taken to date, but I don’t want this project to stop here. Next time will shoot at ISO 200 and try again during full daylight.