This is my second attempt to take a Moon HDR photo and here is a guide so that you can easily make yours.
The acquisition
Obviously, if you don’t have good photos to start with, it is impossible to have a good final image, so it is important to choose your camera settings wisely. To make an HDR, you will need photos with different exposure to merge in post processing.
I used a Celestron 127 slt with a 0.7 focal reducer and a Micro Four Thirds camera, ending up with an f8,5 aperture. With this configuration, I had to take several 1/100 second exposures (called Sun frames in the rest of the article) to capture the part of the Moon illuminated by the Sun and some 10 second exposures (called Earth frames in the rest of the article) for the part illuminated by earthshine (sunlight bouncing on the Earth and illuminating the Moon). But why didn’t I use the HDR function in my camera?
I did not use the built-in HDR function of my camera for two reasons: first of all, it was not designed for this type of photos with such high contrast; secondly, I wanted to have Earth frames and Sun frames individually in order to stack them separately. This way I could remove noise and enhance details in the photos before combining them to make the HDR.
The stacking process
The day after, I downloaded the photos and started stacking. I have a Mac so I used Lynkeos, a planetary stacker (it’s like Registax for MacOS). I used RAW images, so the process took a bit.
To stack the photos, you have to align them, then stack them and, after that, there is a process called deconvolution. It sharpens the photo, but has a side effect. It creates some strange wave patterns, especially visible in the Earth frame stack.
Here is a comparison between the photos before and after stacking. The photos are sharpened to reveal all the details, but in the final image there is no sharpening.


The difference between single photo and stack is subtle when images are sharpened this much, but it’s present.
The HDR
I used Photoshop to make the HDR, but I’m sure any program can do it.
First of all I opened the stacked images as layers and aligned them. I then searched for HDR pro and discovered that I had to export the photos to combine them. Luckily there is a function in Photoshop that lets you export each layer as a single image. After exporting, I used HDR pro and the photo looked like this.
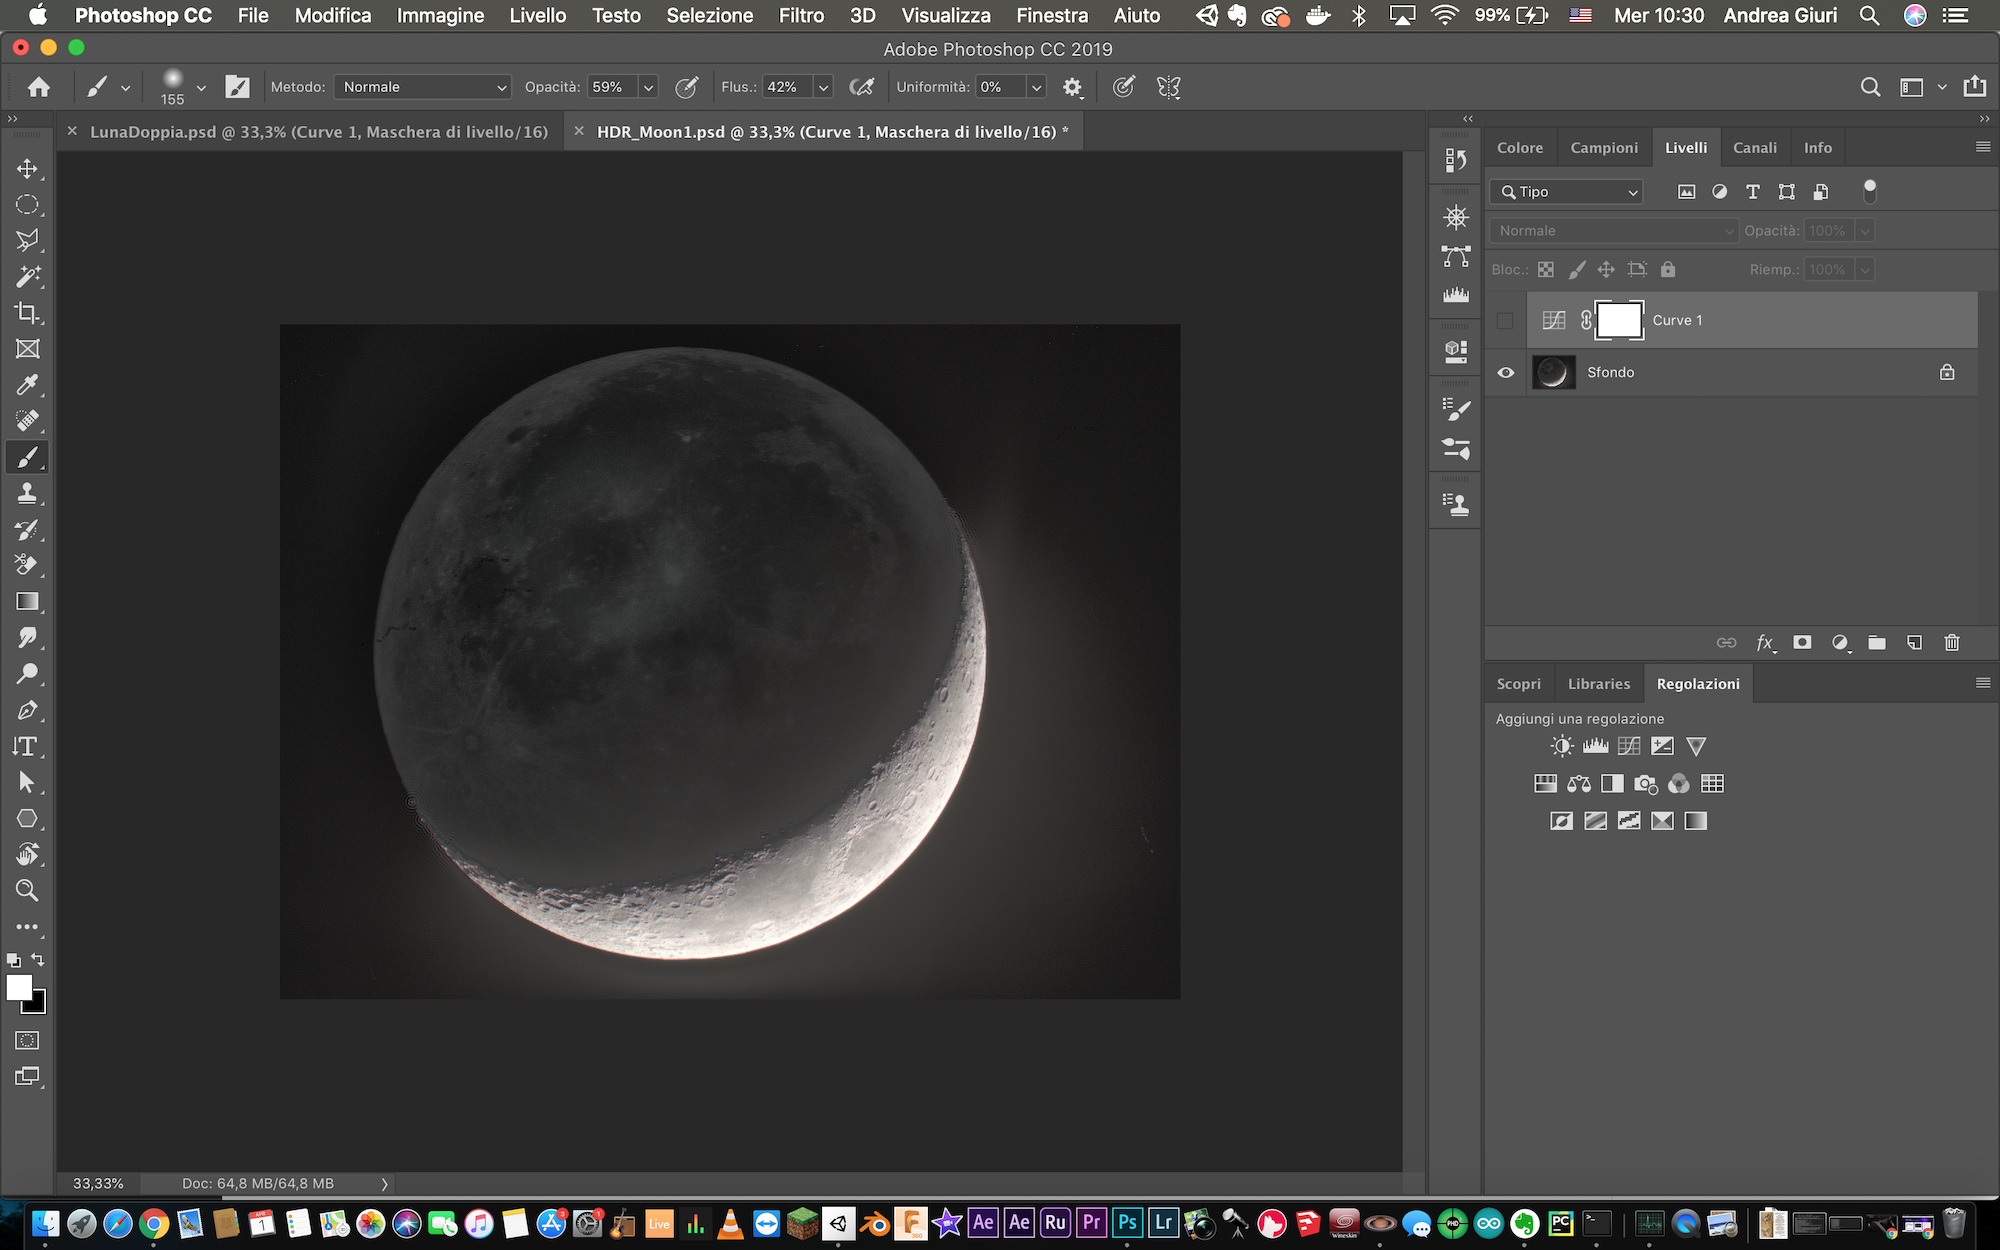
I then added a Curves adjustment (disabled in the screenshot) and imported the photo in Lightroom
The imperfections
I talked about the wave patterns and hot pixels earlier in the Stacking section. During the editing in Lightroom they became a serious problem.
As soon as I added contrast or saturation, those patterns shown. The problem was solved by using the stain removal tool and the manual chromatic aberration removal tool.


This is a screenshot of all the corrections I had to make.
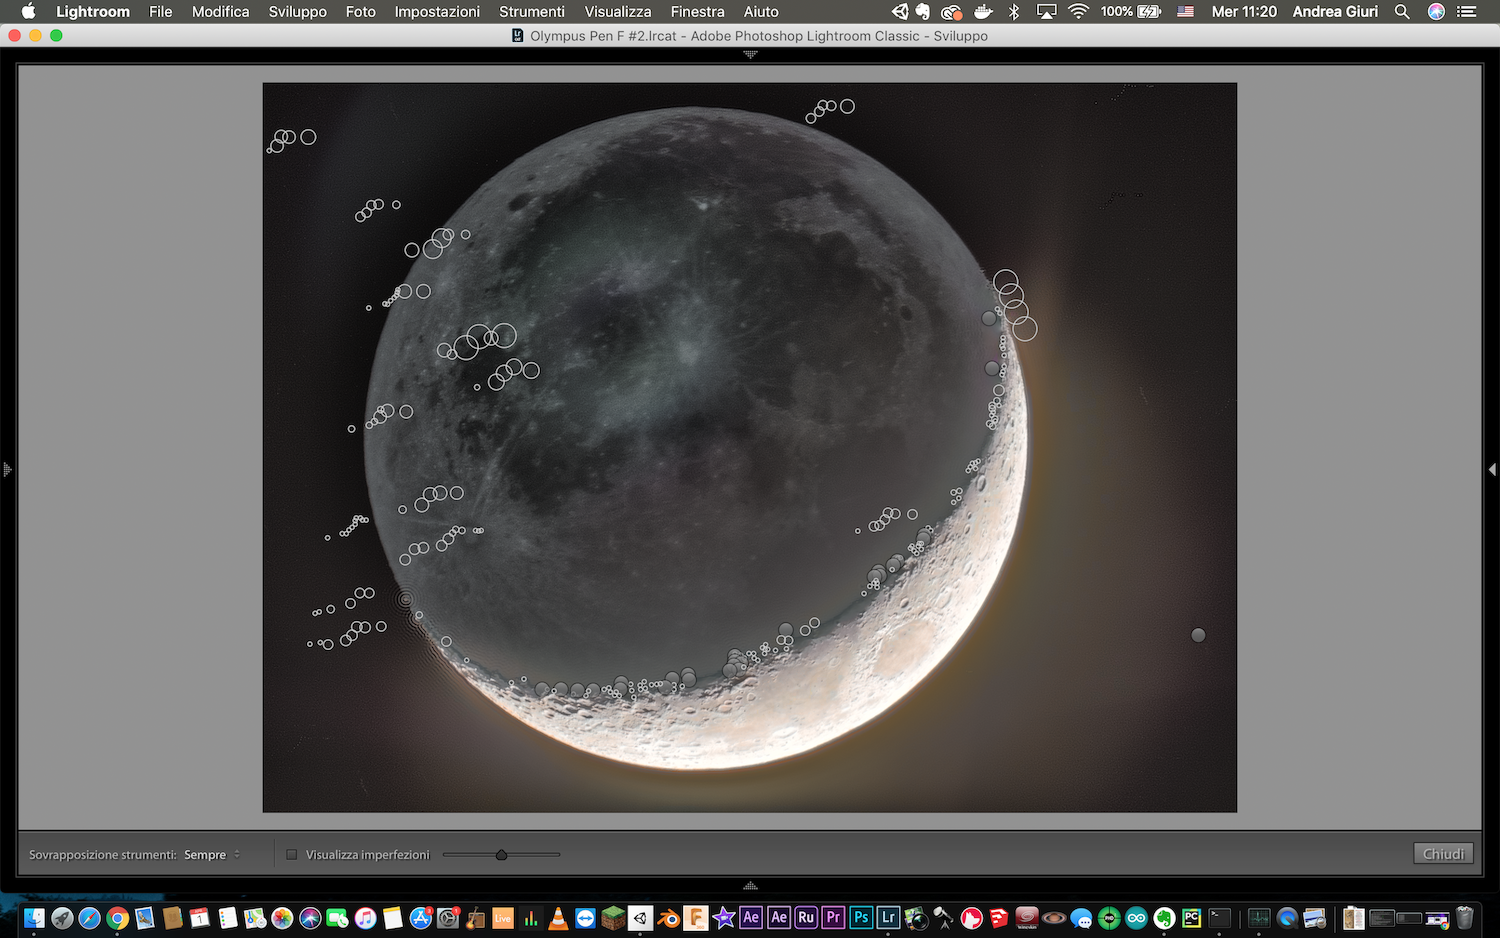
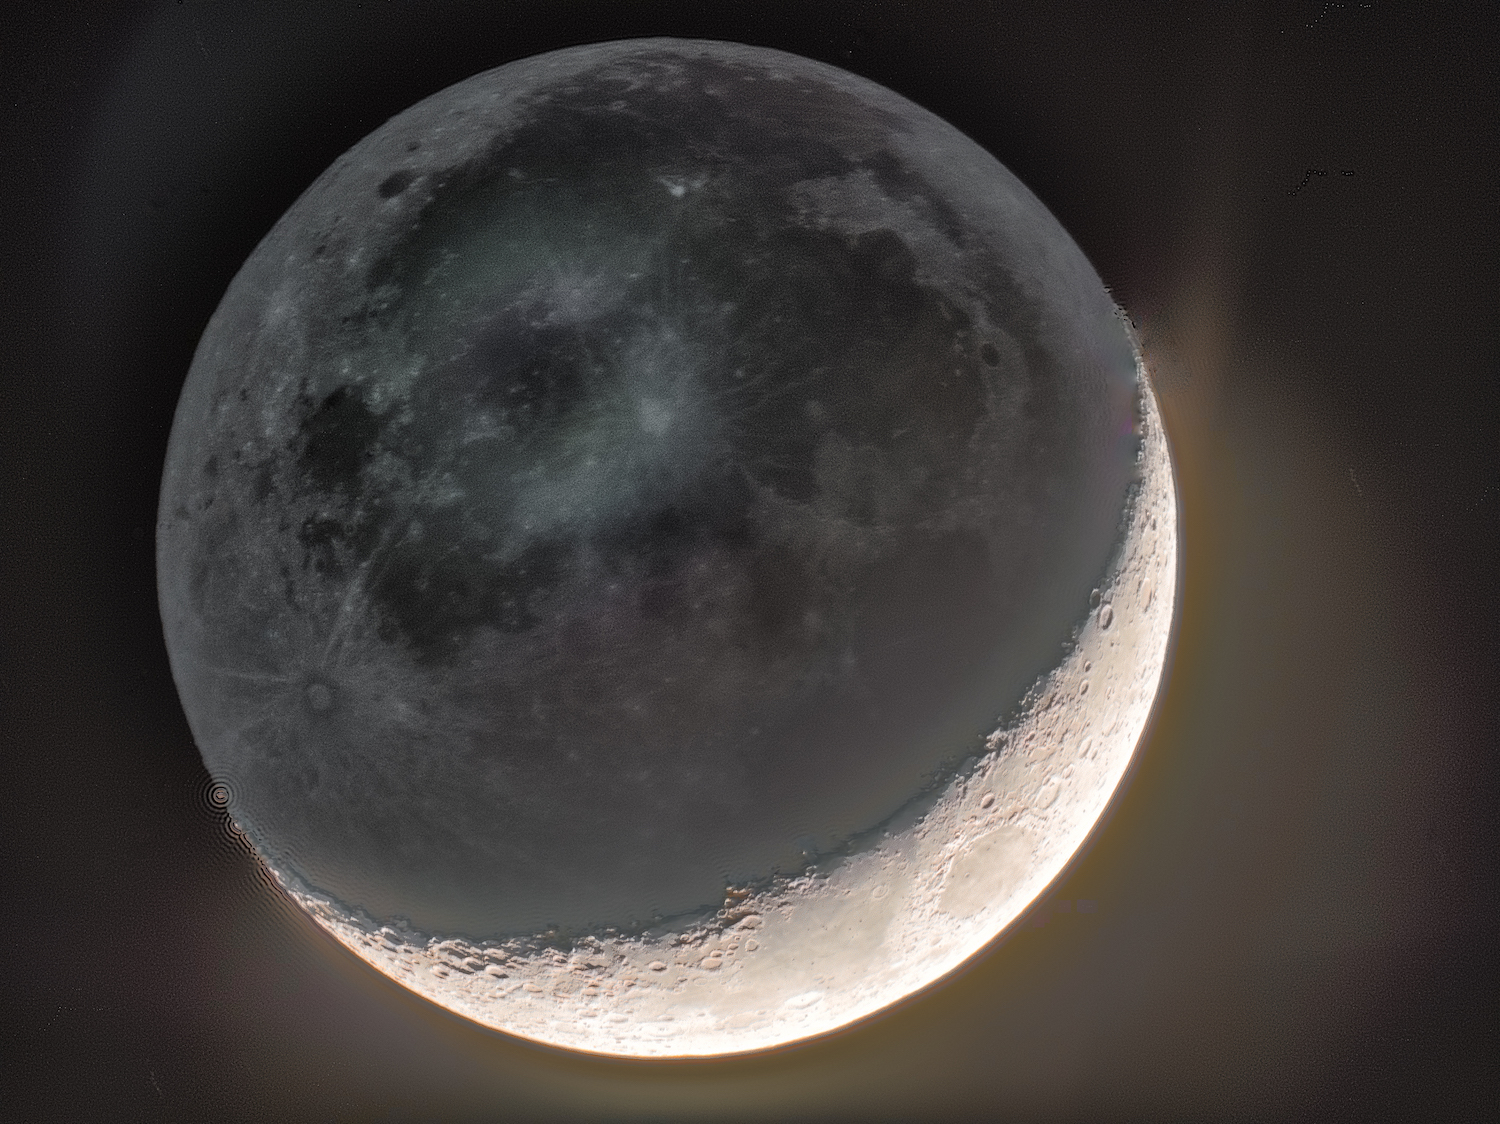
It took me almost an hour, but allowed me to be more creative and add saturation to reveal the colors of the minerals on our satellite.
Here is the final image.